

Awesome? Yes I know. It was so easy to make. Here are my step by step instructions:

I started with a glass cake stand. I draped and actual tutu I bought from the Dollar Store over the sides. Then I added a white plain plate on top.

Then I started baking the actual cakes. I used two 8 inch round Wilton cake pans

I coated the cake pans with the Wilton cake release stuff. I use it for all my cakes so it comes out of the pan beautifully. Then I went to mixing up the cakes and baking.

I needed two 8 inch cakes and a small cake for the top. I used a small bowl to bake the small top part. After the cakes were baked and cooled a bit I put them in the freezer to set. If I am decorating a cake and layering it I always put the cake in the freezer for a few hours. It makes everything so much easier when you go to shape and decorate.
So while the rest of my cake layers were cooling in the freezer. I started on the flowers. This was my favorite part. I used already made Wilton flowers I found at Walmart. I melted white chocolate and used a toothpick to dab some melted white chocolate to the backs of each flower.

I used floral wire to attach to the backs of the flowers. This way I can stick them into the cake and have a 3D effect. So now it was time to prep the doll. I wrapped her really tight in saran wrap. I left the top of her dress out.

Now it is time to layer the cakes up.
I put both the big layers on the bottom stacked together. I iced the top of the bottom layer so it would form a seal with the next layer.


Then I stuck four skewers into the top layer all the way to the bottom to really hold the cake together. Next I had to cut the hole in the middle for the princess.


Just slide her down into the cake when you have the hole cut out.

There she is all ready for her dress now!

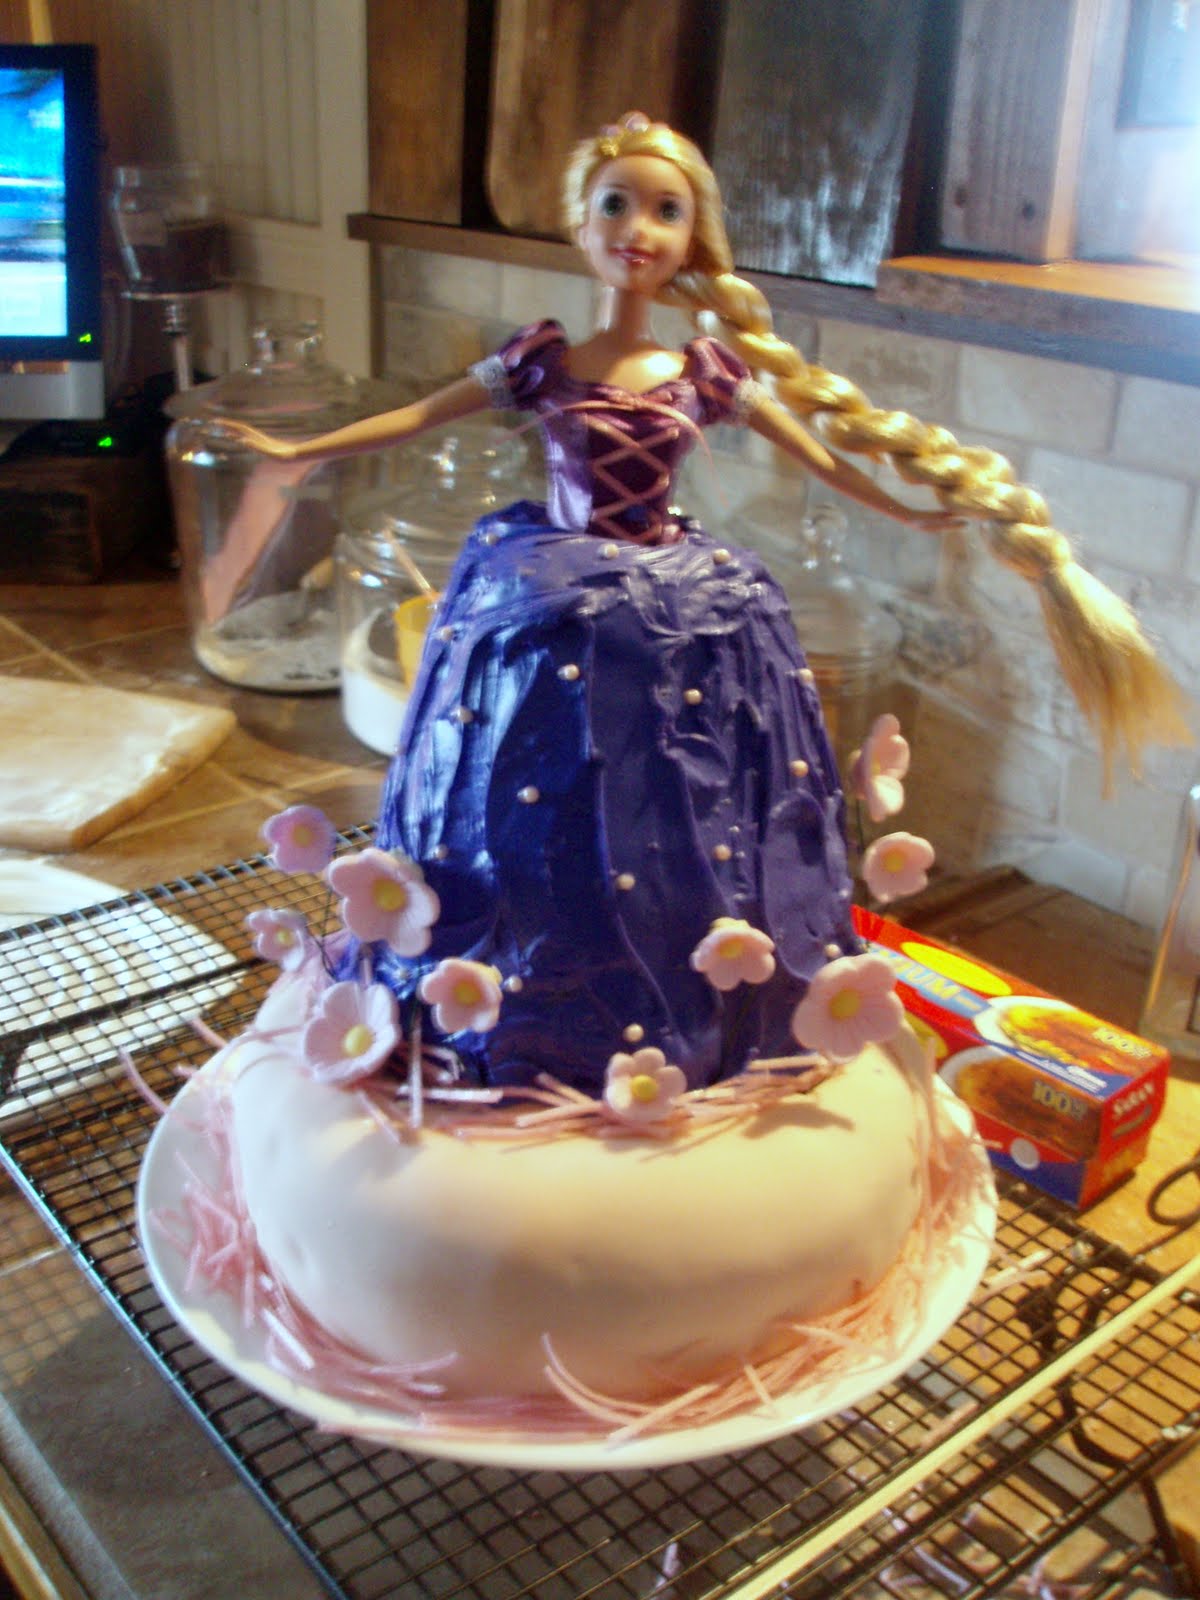
So here you can see what I was talking about with the flowers. I poked the floral wired flowers right into the bottom layer of the cake. I iced her dress using violet icing coloring from Wilton. I added little pink pearls made by Wilton to the dress. In person the dress is actually a soft purple.

The pink stringy stuff you see is called eatable Easter grass. I've only seen it at Easter time and I am going out to buy a bunch in case I make this kind of cake again. I think it made it look really cute.

Finally I transferred her to her cake stand that I showed you earlier. Here she is:


So there she is. All done and fit for a little princess. Thanks for stopping by. I can make this cake with custom colors and princess. Just contact me with a comment or message and I can give you more information. I make cakes for my southern Indiana area. Thanks!
Stacy


Hi~ I found your blog by following a link from the Spring Mantle Party @ WWDIA. I love this cake-you did a fabulous job!!! I bet that was one happy little Birthday Girl!
ReplyDeleteI love your blog, I think you have a new follower ;)
Thank You! She loved her cake and she is so special to me so I am glad to have made it.
ReplyDeleteThank you for following :)
More cakes to come....
LOVE THIS! Come on ova' and link up to my Linky Party! xoxokara
ReplyDelete*ENTER LINKY PAR-TAY Here! *
AMAZING! My daughter just had a Barbie Dress cake! Uuuuummm, I did NOT make hers! Thats awesome!
Very cool! Don't you love fondant?
ReplyDeleteCheryl
http://ldsmomtomany.blogspot.com/2010/10/young-womens-cake-off-beehive-entry.html
So adorable, my daughter would love this! You did a fantastic job!
ReplyDeleteI would love for you to stop by and take look at my dalmatian party!
Warm Wishes,
Jodie
www.lovelaughteranddecor.blogspot.com
How amazing! It makes me wish you were close to me! I haven't had a birthday cake since I was a kid...a LONG time ago! We always had doll cakes and your Barbie cake is gorgeous! I'm going to tell my friend, Twyla to come and look at it! She collects Barbies! WOW! You are GOOD!!! ♥♥♥
ReplyDeleteNeat cake!!
ReplyDeleteHappy Thursday!! I am blog hopping today and would really like for you to come by either or both of my blogs and follow (please) :0)
So Stylilized is where I am currently offering FREE Custom Blog Designs at http://sostylilized.blogspot.com
Jessicas Lil Corner is where I blog about family and life at http://jessicaslilcorner.blogspot.com
Have a very blessed Thursday and I'll see ya over at my blogs!! :0)
Thank you for linking this up to Whassup Wednesday! Hope to see you this week at my
ReplyDeletePar-Taaaay!
xoxokara
Very nice and superb cake I really loved the way you did ... thanks for the detailed presentation ....
ReplyDeletewww.rajafood.blogspot.com